
Google Docs is one of the most useful online word processors included as a part of the free web-based office suite. It allows you to easily create and edit files while collaborating with other users. It also allows users to share and also print documents for personal as well as professional work. Not only you can create and edit your work with text by adding bullets or adding images to your documents, but you can also rotate or mirror these images in Google Docs. Rotating and flipping an image differ from each other. Rotation of an Image in Google Docs means you are changing the appearance of the image but flipping an image makes a duplicate but a mirrored copy of it. Rotating the image does not mirror the image necessarily.
For instance, when you are rotating an image 180 degrees it will rotate the image upside down. But flipping the image will make the left of the image right and vice versa. Google Docs allows you to rotate and mirror the image across the horizontal axis. There are two possible ways to rotate photos, but there is only one possible way to flip photos. In this article, we will discuss how to Flip an image in google docs and how to rotate an image in google docs.
Related Post: How to change default google account.
How to Flip an image in google docs in 2 Steps:
Scroll down to flip the photo in google docs.
Step 1: Insert an image into Google Docs First
- First, open Google Docs directly on the desktop on your computer.
- Now, open the document having image you want to flip.
- Then, place the cursor on the page and tap where you want to insert the image.
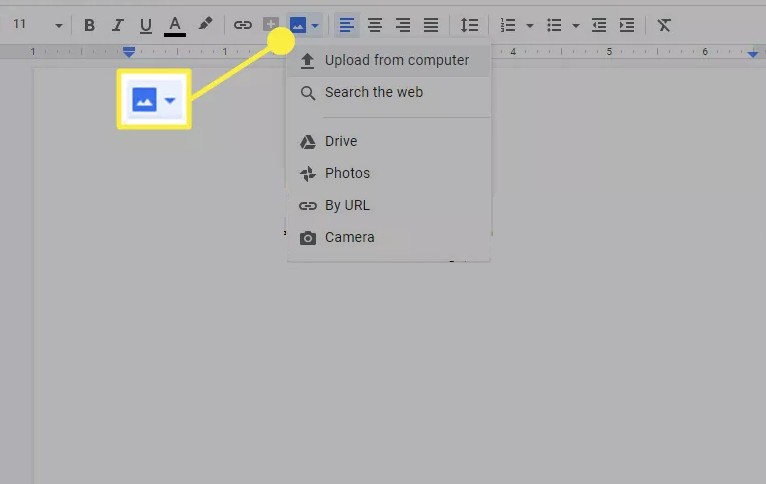
- Now to the “Insert” tab present at the top menu bar in-between view and format.

- Then click on the image option appears first in the drop-down menu.
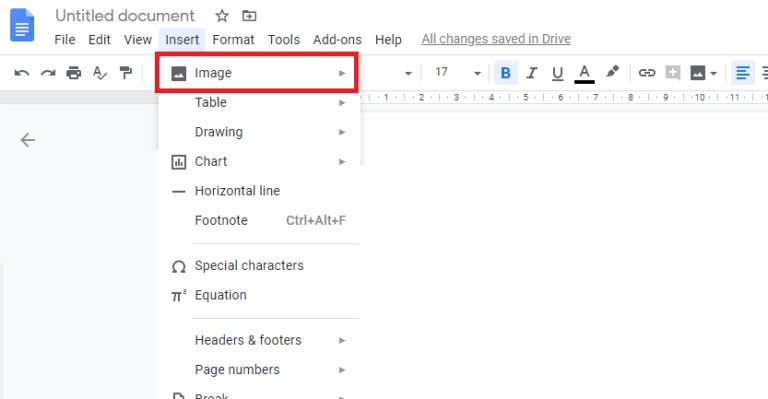
- Now choose, from where you want to export the image.
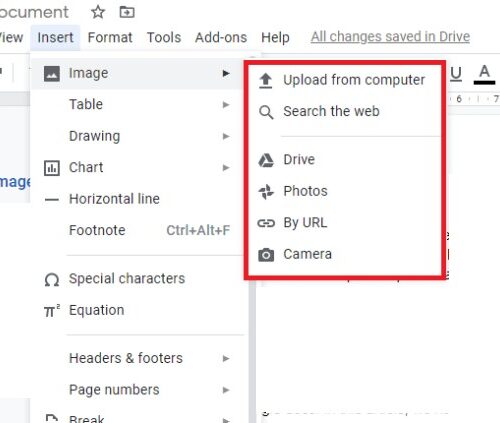
- Select the image and insert it.
Related Post: 3 best ways to Reopen Closed Tab.
Step 2: Flip the image
- Now, tap on the copy to copy the image.
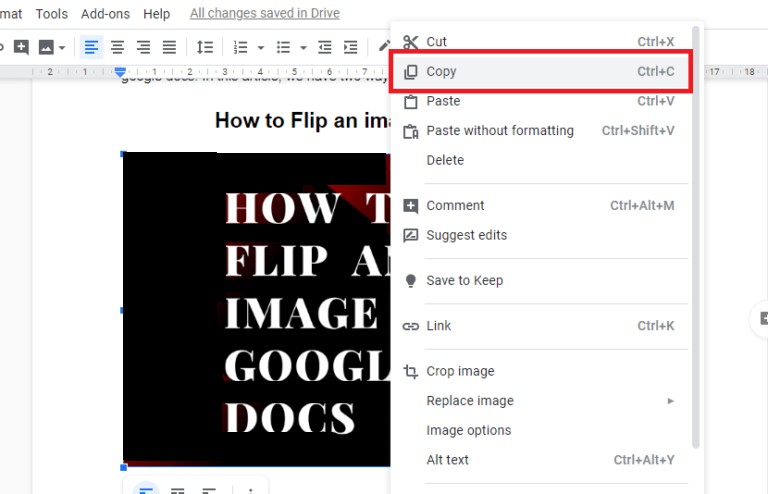
- After copying the image now, click the Insert option that appears on the menu bar.
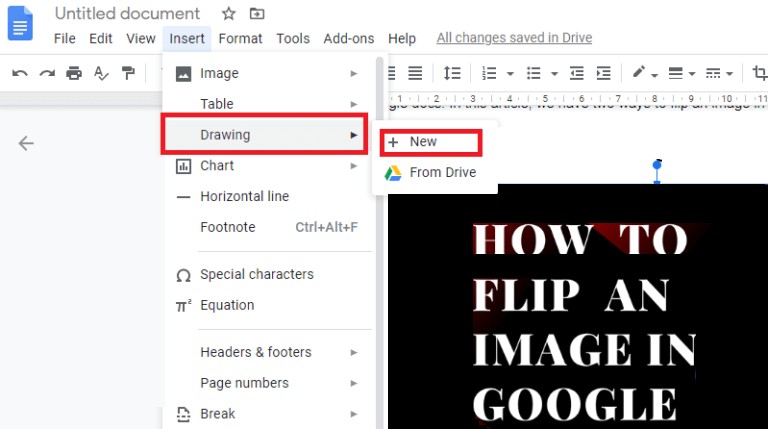
- Now, click the drawing option that appears in the drop-down menu.

- Then click on the File option.
- A drawing tool will appear where you can edit the image.
- Now, right-click in the blank space of this tool and then insert your copied image into the drawing tool by clicking on Paste.
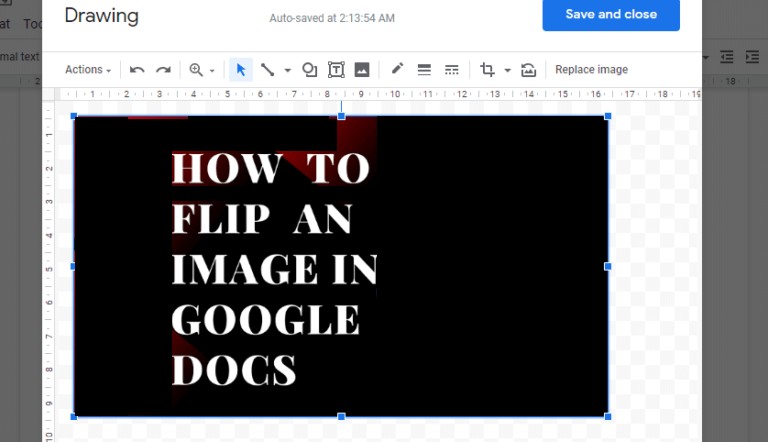
- Then tap on the rotate option, you will see 2 options out of 4 that appears on the face.

- Click on flip vertically to mirror an image vertically, and if you want to flip horizontally tap on Flip horizontally.

Related Post: Use Google Lens to copy and paste Handwritten text.
Flip an image in Google Docs on Mobile Phone
You can mirror your image in google docs using your smartphone if you don’t have a computer. Google does not offer this feature in the mobile app so we have to open google docs on mobile. Follow these easy steps to know how to flip an image on google docs
- First, open the google chrome browser on your mobile phone in desktop mode.
- Click on the three dots icon that appears in the upper right corner of your mobile screen.
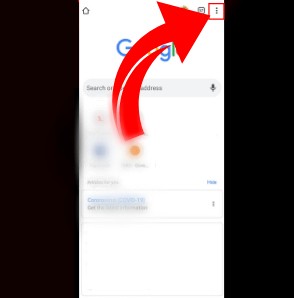
- Now, you will see the Desktop site option. Simply tap on it to activate.

- Once you are finished launching the desktop site mode, tap on this link https://docs.google.com/document/ to open google documents in chrome browser.
Now, follow the above-mentioned method to flip an image in Google Docs as now, your mobile is doing your desktop’s job.
How to rotate an image in google docs 2 Solutions:
1. Using Image Options
There are several ways by which you can rotate your image in Google Docs. Follow these easy steps to know how to rotate an image in google docs.
- At first, insert an image into the document by following these steps.
- First, place your cursor where you want it to appear in the document and click Insert Picture option appears in the top menu.
- Now, select the photo and upload it.
- Once you are done, now select the Image to make Blue Bounding Border appears.

- There is a see a small menu present below the image.
- Tap on the three vertical dots icon, then select Size and Rotation.

- You will see Image Options pane appears on the right side of the screen.
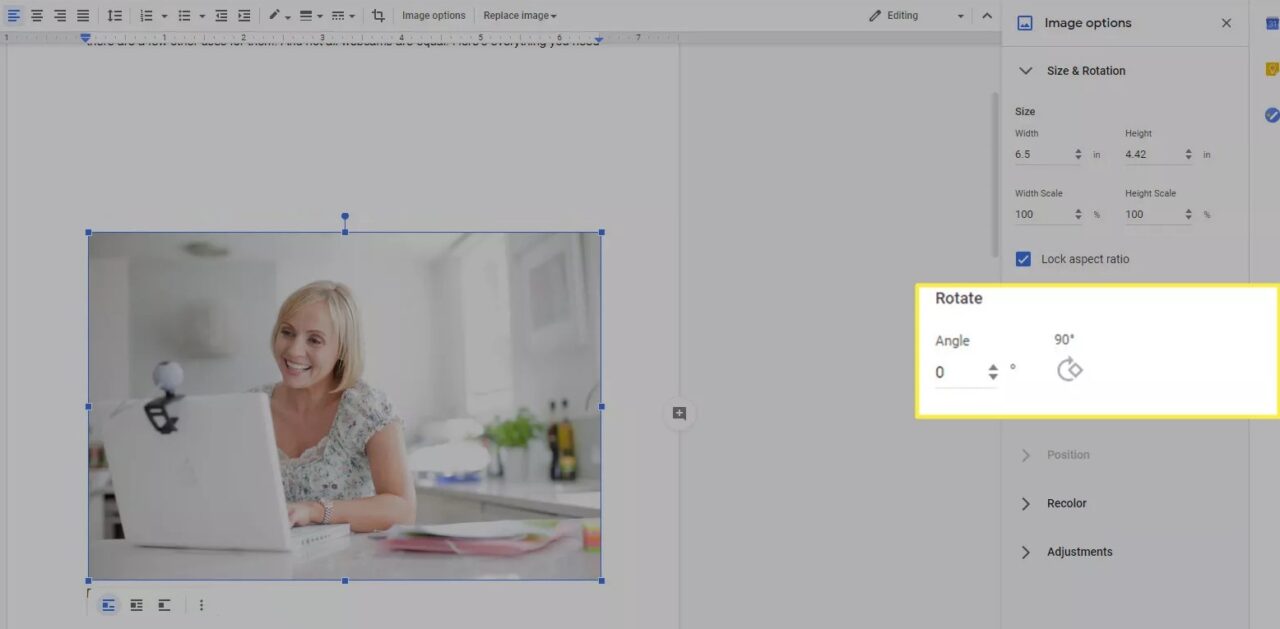
- From here you can change the angle of the image by tapping on the options under the rotate Section.
2. Using the Rotate Control
There are square dots on each corner and in the center of each side of the blue bounding border that appears when selecting an image. These dots are here to resize your image. Also, there is a round blue circle called rotation control present in the center of the top edge of your image. Just select the image, click and hold that blue circle to rotate the image.
I hope this article would be of some help to you. If you have some another amazing trick or if you face any difficulty in doing so, let us know in the comment section below.